You Need to Know What is Bleed in Printing?
Bleed in printing enables designs to extend to the perimeter without white spaces. Learn what bleed is, why it is important, how to set bleed to allow printing of your design on a 3 mm bleed, and why it makes your print designs look great, clean, and pro quality.

Emily Parker
Have you ever seen a small white line on the border of a flyer after printing it? That line shouldn’t be there. It seems like when you do not use bleed on printing. This small mistake can ruin a design. Printers cut stacks of paper fast, and if your design stops right at the edge, even a small shift makes the border look wrong.
In this blog, we are discussing what bleed in printing means, why it’s important, how to add it, and what you need to do in your design software to get it right. A study by Printed.com shows that 85% of print errors come from not adding bleed properly. Bleeding is an industry standard, not a conjecture. Let’s explore how using print bleed helps you print like a pro.
What is bleed in printing?
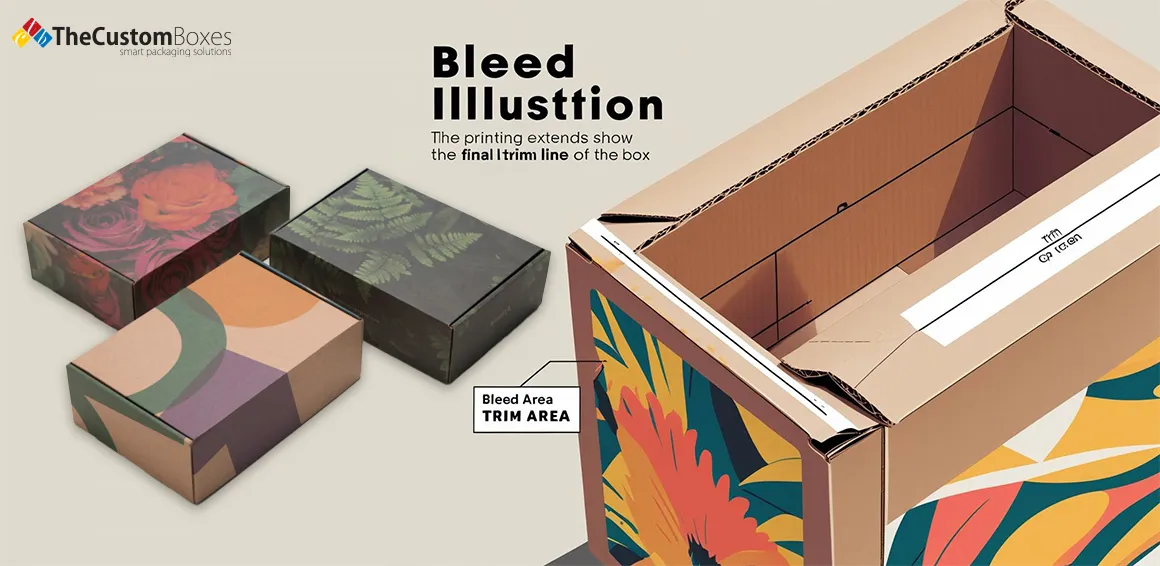
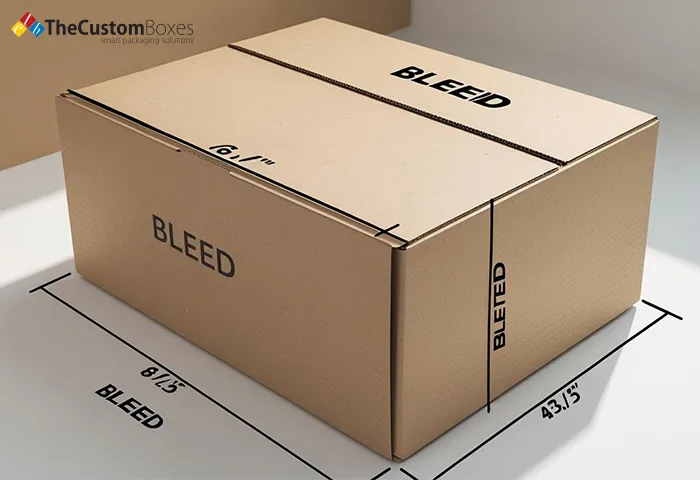
Bleed in print design means the colour or image in your design goes past the page’s edge. It gives printers room to cut the paper correctly. Without it, your design might stop early and show white lines.
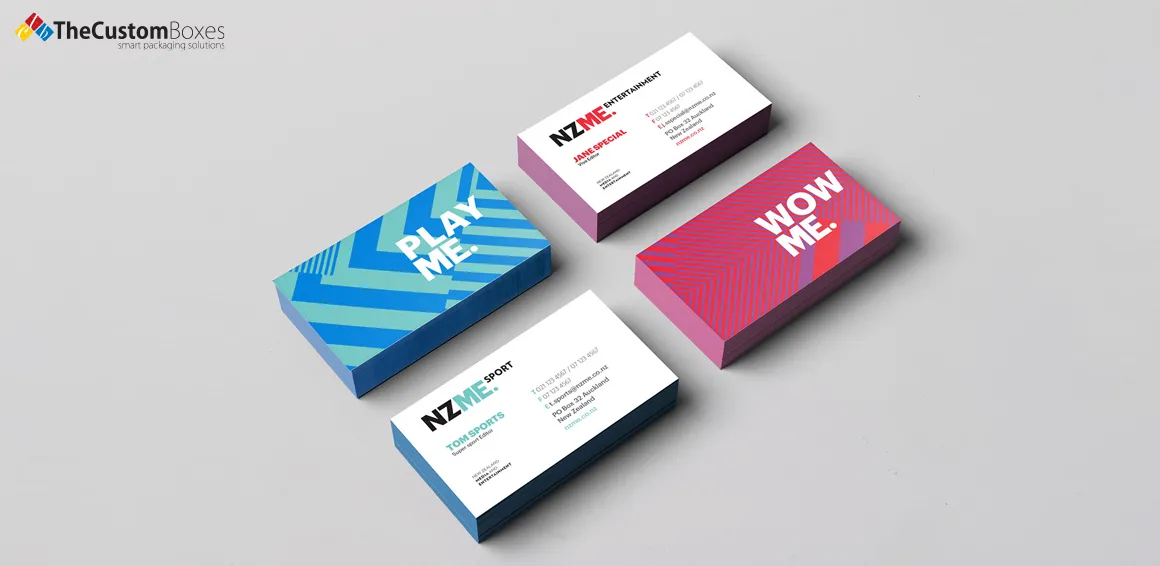
Imagine you’re printing a red business card. If you don’t use bleed, and the paper cutter moves just a bit, you’ll see white around the edge. That’s not good. But with bleed printing, the red colour stretches past the trim line, so even if the cut shifts, the edge stays red.
So how much space do you need? Usually, you add 3 mm bleed for printing on all sides. This makes your final file just a bit bigger than the finished product. You might not think so, but it makes a huge difference when you rip hundreds of sheets.
Clean, edge-to-edge performance is all about bleed. It makes your design look finished and professional.


Why Bleed Matters in Print Design
If you want your designs to look their best, you need to use bleed in print. It’s that simple. Without bleed, designs can look messy or unfinished. Customers notice these things. And they judge your brand by how neat your materials look.
Printers use large machines to cut stacks of paper. Even with top tools, there’s always a tiny shift. A 1 mm shift may not sound like much, but it can ruin a sharp edge. That’s why we add bleed.
When your image or colour reaches beyond the cut line, that small shift doesn’t matter. Your design will still look perfect. That’s why all smart designers use bleed in print design. And print companies ask for it every time.
Using bleed shows that you care about the little details. That builds trust. And people like to buy from brands that look polished. The Custom Boxes always include a bleed setup in our design services to make sure your final product is just right.
Do All Prints Require a 3mm Bleed?
Not every print needs a bleed. But almost all do. Most standard items like flyers, business cards, and brochures need a 3 mm bleed for printing. This amount is enough to allow for small cutting errors and still get a perfect edge.
If your design has a white background with no images going to the edge, you might skip it. But that’s rare. Most modern designs use full colour or images across the page. That’s why the standard print bleed is so important.
Some larger items, like banners or posters, may need more than 3 mm. But for most projects, 3 mm is the safe and common choice. According to Printed.com 3mm bleed is the norm in the UK.
Our team always checks files to make sure the bleed is added properly. If you forget it, the print might get rejected or come out looking wrong. That’s why we say: always add bleed in print unless your printer tells you not to.
Standard Bleed Measurements
When you design something for print, the size must be just right. But you can’t just use the final size. You need to add bleed. That’s where standard print bleed comes in. It means how much extra space to add around your design. This extra space helps the printer cut your project cleanly.
What is the need for these specific numbers? This is so because printers cut piles of paper simultaneously. The smallest movement can occur during the cut, even with the best machine. This movement, whether it is 1 mm or more, can goof your edges. When your design ends at the trim line, any slight movement harbours a white leaf. However, in the case of bicycling using bleed, that space could never be seen. Your images and colours will still go to the edge.
Suppose you are having a business card design. The last dimensions are generally 85 mm by 55 mm. In printing with 3 mm bleed, you print at 91 mm x 61 mm. With 3 mm bleed in printing, you make your file 91 mm by 61 mm. That gives the printer space to cut, and your card will still look perfect. A neat, polished appearance without any strange edges or white stripes.
Some larger items might need more bleed. Posters, banners, and folded brochures can move more during trimming. That’s why printers may ask for 5 mm bleed or even more. However, for the majority of work, a 3mm bleed print is indeed ideal (flyers, postcards, menus).
Such design programs as Adobe Illustrator and Canva also abide by the rule. When you set up a project, they ask for your final size and your bleed printing size. Just enter 3 mm in the bleed box. Then your artboard will show guides to help you stay inside the trim zone and stretch your colours or background past the edge.
The Custom Boxes checks all these things before printing. In case your file does not conform to the standard bleed dimensions, we will correct it or even request that you correct it. It will assist us in ensuring that your prints look great the whole time. We care about getting your job done right.
How to Set Up Bleed in Design Software

Adding bleed for printing is not hard. All you have to do is know who to look at. Bleed has a specific setting in design software, such as Adobe Illustrator or Adobe Photoshop.
In Illustrator, create a new file. Look for the “Bleed” box. Set each side to 3 mm. This will show red lines around your artboard. That’s your bleed area. When you save the file, check “Use Document Bleed Settings” in the export box.
You can enlarge your canvas by 6 mm in Photoshop (3 mm on each side). When printing a flyer (A5, which is 148 mm x 210 mm in size), size your file to 154 mm x 216 mm. Make sure your logos and text are within the trim line, or at least 3 mm from it.
Canva also has an option to show bleed. Just go to “File” and check “Show Print Bleed.” It will show a dotted line around the page. This helps you stretch background images and colours to the right size.
If you’re not sure how to set up bleed in print, The Custom Boxes can help. We fix files and guide customers to get things ready for print.
Final Thoughts
Now you know what bleed in printing is and why it matters. It keeps your edges sharp, your colours full, and your designs looking their best. It’s not a small detail. It’s a must-have for good print work.
Most jobs use a 3 mm bleed in printing. It’s the industry standard for flyers, cards, and brochures. Always check with your printer, but when in doubt, add the bleed. You’ll avoid problems and get a clean result.
Adding bleed in print design is easy in software like Illustrator or Canva. Just remember to stretch your background and keep your text safe inside.
Want perfect prints without the stress? You should buy your custom boxes and printed materials from The Custom Boxes. Our team handles bleed, design setup, and more, so your brand always looks sharp and ready to impress.
FAQS
Why is bleed important in custom packaging?
It shows when you fail to utilise Bleed – it ensures that your packaging design is taken to the edge. It prevents the appearance of white lines when you cut them, so your boxes end up looking clean and professional.
What is the standard bleed size for printing?
The basic bleed is 3 mm all around. This additional space assists the printers to trim the design to perfection without losing or displaying the white spaces.
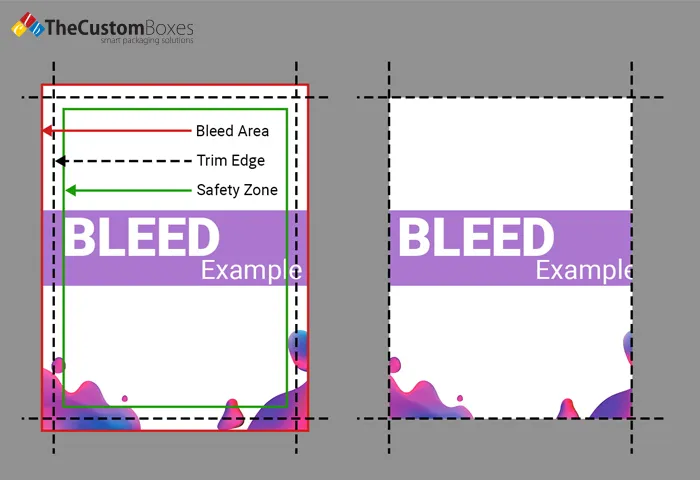
What’s the difference between bleed, margin, and trim?
Bleed is extra space outside the cut line. Margin is the safe space inside the design where no text should go. Trim is the final size after cutting.
Does bleed apply to digital printing and offset printing alike?
Bleed is required in both digital and offset printing, yes. Small cutting shifts may occur, even when the method is not the same; therefore, bleeding makes all the print products look flawless
Most popular post
Premier American Manufacturer of Packaging and Custom Boxes
Experience the ease of creating and ordering custom boxes and affordable packaging online with the Custom Boxes. Contact us today to discover how we can turn your packaging vision into a reality.

Payment & Security
![]() No Hidden Charges
No Hidden Charges
![]() Money Back Guarantee
Money Back Guarantee
thecustomboxes.co.uk online guarantee the privacy of all the customers and never share their personal information with third parties. For more details read our Privacy Policy.


.webp)